
One of the biggest changes in day-to-day system use is the FastTab. In this post, we’ll go over how to control Field Importance to help you make Microsoft Dynamics NAV Role Tailored Client more helpful every day.
In our post, The Anatomy of a FastTab, we outlined how fields can be different Importance. To recap: Importance Promoted are shown in the FastTab bar when collapsed, Importance Additional are hidden behind the Show More Fields button.
In our example today, we’re going to make the Purchase Order page more tailored to our client. They have asked:
- To hide the Buy-from Contact field
- To hide the Buy-from City field
- To hide the Buy-from State / Zip field
- To show their Department and Project dimensions on the Invoicing FastTab “like the Payment Terms Code” so they can make sure those are always right
- Remove the No. of Archived Versions field entirely, even from Show More
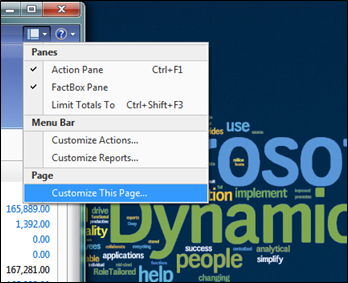
To get started, we want to open up the Purchase Order page, and then locate the Customize This Page option:
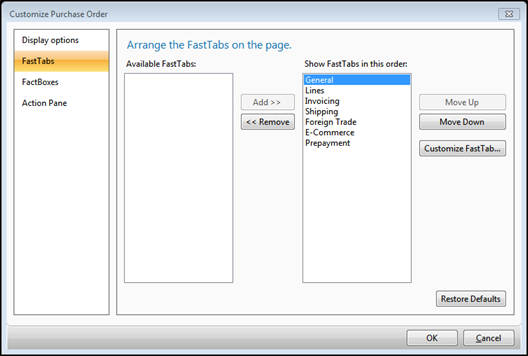
The Customize Purchase Order window will open. Select the FastTabs option on the far-left, then press the Customize FastTab… button on the far-right (the General FastTab is selected by default, as it is first, so we’re Customizing the General FastTab):
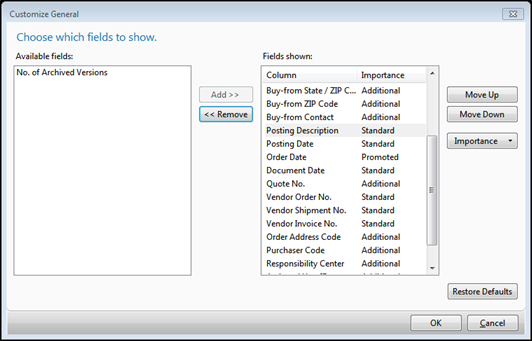
You’ll now see the Customize General window:

You may need to resize the window a little larger to see everything.
Select the Buy-From Contact No. field. On the DropDown for Importance, select Additional:
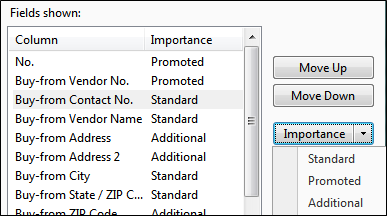
Note: You can also click the Importance button multiple times to cycle through the options.
Repeat this demotion to Additional for Buy-From City and Buy-From State/ZIP.
As we mentioned, folks wanted the No. of Archived Versions field removed entirely, so we’ll do that here. Select the field in the list, then press the Remove button. That should move it to the left column:
Click OK (once) to head back to the Customize Purchase Order window. We’ll want to select the Invoicing FastTab and press Customize FastTab… again.
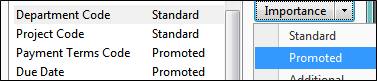
In this case, we’ll want to set the Department Code and Project Code to Importance Promoted:
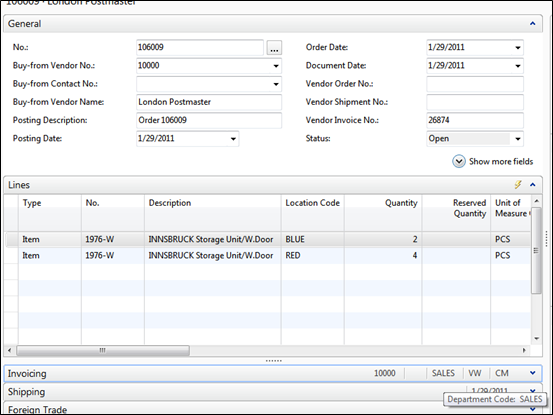
Click OK (once) to head back to the Customize Purchase Order window. Click OK (once more) to head back to the Purchase Order, which will close and re-open now, with all of our changes:
Hopefully, this will help you and your team make the RTC a really great fit for the exact way you do business – removing unneeded fields makes the key ones stand out.
The best part about these changes is that they’re per-user or per-profile and will not be affected by most object changes, but that’s for another post.